What is the Project Manager?
The Project Manager is a native tool in Premiere Pro for project copy, consolidation and transcoding.
Project Copy consists in gathering all your project assets into a single location for archiving or transfer purpose.
Consolidation and Transcoding, which means convert into a given format, has diverse interest:
- Standardize all your videos into the same format.
- Free some disk space by keeping only used part of your media.
How to use Project Manager
First thing to know is where to find the Project Manager!
You can access it from File > Project Manager.
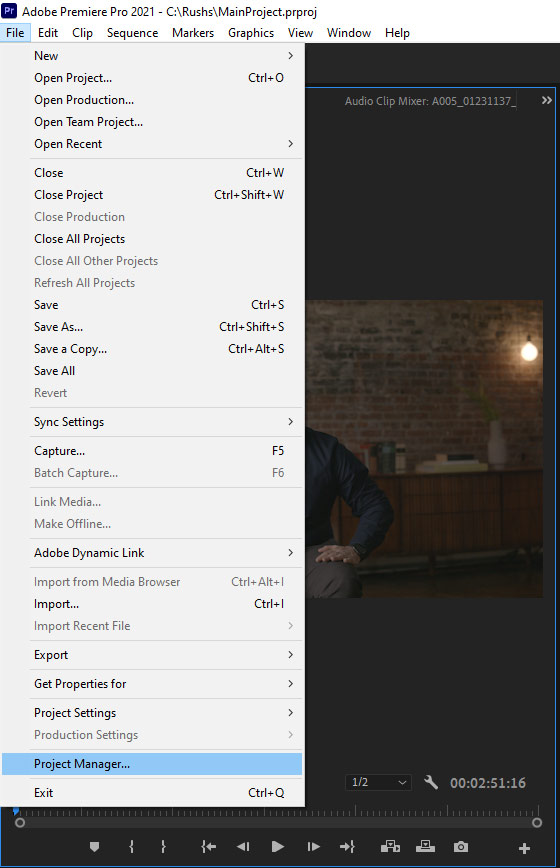
This will open a new window dedicated to the Project Manager:
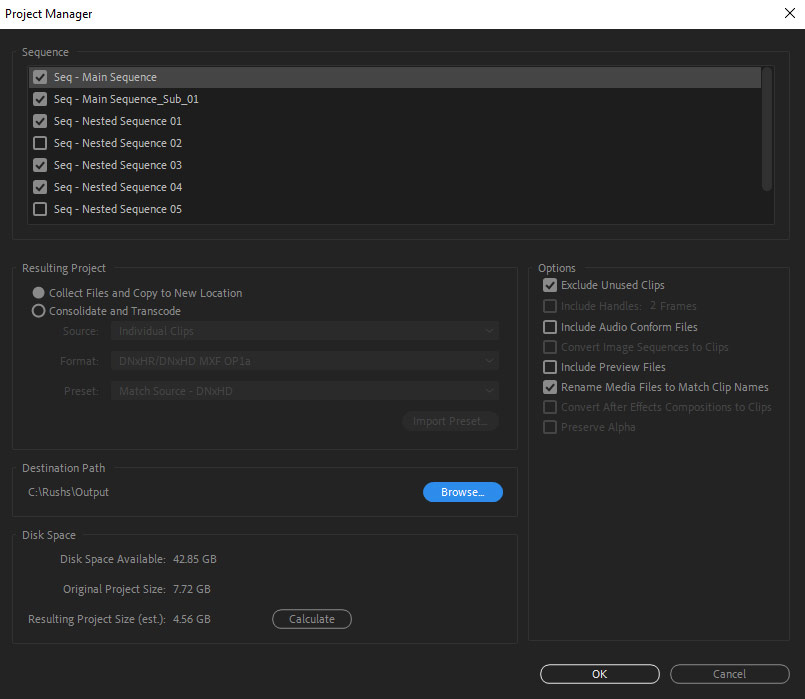
Resulting Project section
The first section you should fill is the Resulting Project section. Here you will define for what main purpose you want to use the Project Manager but in both cases source files won't be modified or moved.
You have two main choices:
- Collect Files and Copy to New Location. This option will gather all the media used in the selected sequences and copy them to a new designated location. Copying the entire clip prevents image degradation which might be caused by transcoding a part of it.
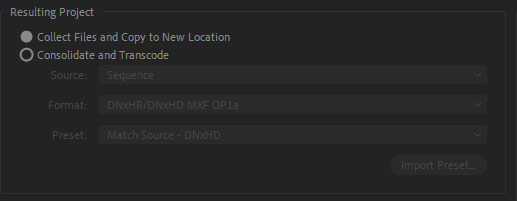
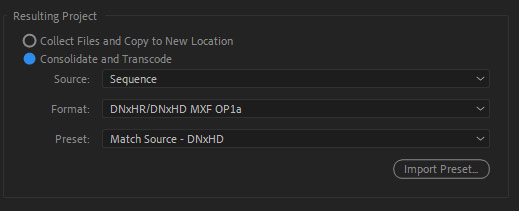
- Consolidate and Transcode. This option will gather and then transcode all the media used in the selected sequences into a single format. All transcoded files will be placed into a single new location with the Premiere Pro project. Transcoding into an Intermediate File Formats can be a better choice for editing than using the camera native file.
When should you use one choice instead of the other? Here is a list of scenarios and the option you should choose in each of them:
If you are looking to transform all your files into a single format for diverse purpose:
Standardize your files, use a codec adapted to the editing process.
Then you should definitely use the Consolidate and Transcode option.If you want to remove unused parts of your files to save disk space and improve your editing experience you should choose the Consolidate and Transcode option.
If you want to keep your original codec and quality, then transcoding is not the right solution for you. You should use Collect Files and Copy to New Location.
If you want to transfer to a colorist or VFX artist only the used part of your media and you don't care to keep the exact same quality and codec you should use Consolidate and Transcode.
If you want to archive your project and be able to re-edit it later with the same freedom then Collect Files and Copy to New Location is what you need.
If you want to archive your project but you want to optimize the size of it and still want to keep some freedom to re-edit your project later then you should use Consolidate and Transcode and add Handles (this will be more detailed in a next chapter)
Sequences selection
Next step, you need to select the sequences you want to keep into the consolidated project.

If you want to copy the whole project then check all sequences displayed.
Be aware that nested sequences are not really well supported by the Project Manager: only one level of nested sequence will be taken into account if you select a sequence with nested sequences inside.
If you have a complex project with many nested sequences and especially nested sequences inside nested sequences then you have two possibilities:
- Keep every sequences without distinction by filling every sequence checkbox.
- Walk through your sequences starting from all main sequences you want to keep and note the name of each nested sequences inside recursively then check each of these sequences to be sure you won't loose anything in the process.
Options explanation
Then you can choose your options according to your needs.
For Collect and Copy Files and Consolidate and Transcode the options you can fill are not the same.
Common options
The common options are:
Exclude Unused Clips
Check this option if you just want to keep media used in the selected
sequences. All other media won't be copied or transcoded into the destination
folder.
This option can be used when you have already finished your clip
selection and you want to free some space from unused media.
If you don't check this option then all the media in the Project Panel will be copied, however be careful unchecked sequence won't be kept inside the Project Panel. If you have not completely determined your clip selection yet then this is the best option.
Rename Media Files to Match Clip Names
Check this option if you want your copied or transcoded media to be renamed using the name you have put into Premiere Pro Project Panel.
Uncheck if you want to preserve the source files names unchanged.
Collect Files and Copy Options
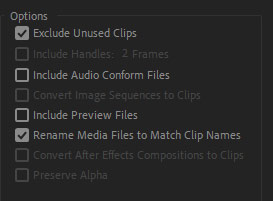
Include Audio Conform Files
Audio files are conformed when you import them for the first time or when
Premiere detects additional changed to the media. This step can be time
consuming when you have a lot of media.
So including Audio Conform
Files will ensure that you will keep your audio conformed in the new
project.
If you uncheck this option you will gain some disk space but next time you want to edit your project you will need to re-conform the files all over again.
Include preview files
When checked Render files from the original project will be copied to the new project. Including them means you won't need to render again if you reopen the new project later.
When unchecked you will save some disk but Premiere will render them again next time you open the consolidated project.
Consolidate and Transcode Options

When you have selected Consolidate and Transcode, you can specify in which format you want the clips to be converted.
You have three things to fill:
Source
Source will define from what source the Project Manager will use the frame rate, frame size, field type and pixel ratio.
- Sequence will use settings of the selected sequence(s). If your sequence settings match your final delivery settings then you can use this option.
- Individual clips will use clips individual settings to transcode them. You should choose this setting if you want to avoid changing too much your source file specificities.
- Preset will use the settings of the given preset for the transcoding. If you want to standardize the best your files then this option can work for you.
Format and Preset
Here you can choose the codec you want your file to be re-encoded with.
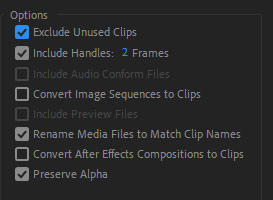
There are specific options for Consolidate and Transcode:
Include handles
This option allows you to add extra frames to the used part of your media in case you want to be able to re-edit your clip in the future. For instance if you choose 50 frames as Handles value the transcoded files will begin 50 frames before the In point in Premiere Pro sequence and end 50 frames after the Out point.
Convert Image Sequences to Clips
If you have used Image Sequence clips into one of the selected sequence, you can choose to convert this image sequence into a video file using the chosen output format. This will remove the unused frames of your image sequence.
Convert After Effects Comps
This option will export your After Effects Comps into a video file. This will improve playback in Premiere Pro.
Preserve alpha
If you want to preserve alpha channel of your video then you should check this option.
Project Manager Bugs and Limitations
The Project Manager has some annoying limitations that can make your work harder.
The Project Manager does take into account only one level of nested sequence, if you have a nested sequence inside a nested sequence, it won't be kept inside the output project. To be sure to take every single sequences you need, you will have to check one by one each sequence
Other annoying problem with the Project Manager is that the output folder data structure is flat, everything is put inside one folder.
Neither Premiere Pro project bin structure nor the folder structure on hard drive is used for the output folder.
There are also some bugs left inside the Project Manager for some times:
If there are multiple Project Items for one media, this media will be
duplicated the same number of times in your final project.
For
instance if you have imported twice a file, or you have created a subclip or a
merged clip out of it, in the output folder you will have your file twice.
Project Items' Markers can be shifted if you use the transcoding option.
Unfortunately the Project Manager is known to have regularly "Unknown error" happening.
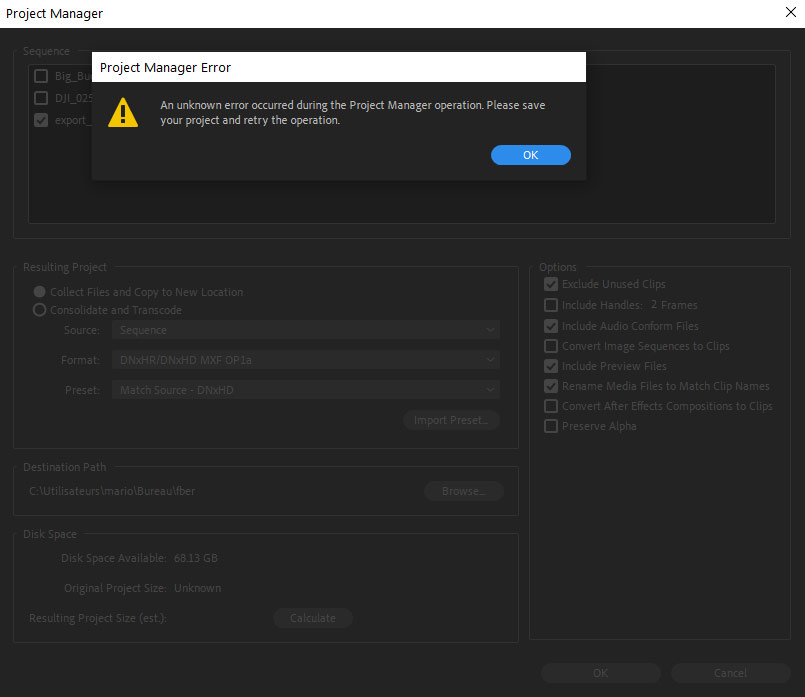
If you are facing this issue here is a list of things you can try to solve the problem:
- Uncheck "Include Audio Conform Files"
- Uncheck "Include Preview Files"
- Delete all your proxies
- Check if you have special characters in your video/photo/work files naming like "+", "#", "$", ...
- Delete Adobe Premiere Pro Cache
- Uncheck "Exclude Unused Clips"
PlumePack VS Project Manager
We are developing a plugin called PlumePack to propose an alternative to the native solution with less bugs, more client support and also with a lossless trim option.
If you want to understand the difference between PlumePack and the Project Manager here is comparison between both solutions.
Useful Links
If you want to learn more about the Project Manager here is the official documentation.
